Anderson PowerPole 45A and 75A Connectors – Amazing for RC Cars and Planes

Anderson PowerPole are the best connectors for RC cars, boats and planes

In the last couple of years I have tried a number of different connectors and I thought that I’d share my experience with one specific brand that has blown the competition away – The Anderson PowerPole’s…

I have tried the lot. For less demanding applications I have often used Deans, XT-60, EC3/EC5, Traxxas connectors and multiple brands of bullet connectors. For up to 300A applications I have used Neu bullets, Castle Creations bullets, the largest bullets from HobbyKing, Schulze connectors, Plettenberg’s largest connectors, etc, etc…

Then one day I cam across someone on a forum that recommended the Anderson PowerPole connectors. They are typically used in industrial applications but also lends themselves quite brilliantly for RC. As I see it the advantages are:

  • The absolute best is of course that no soldering is required and that they are quick to fit
  • Soldering will every now and then have a bad connection – but with the Anderson PowerPoles the connection is always perfect
  • If you are using an ESC without a spark eliminator system you do not have to worry as the spark on the Anderson Power Poles happen on the tip of the connector when you connect them and not at the actual area where they connect (it’s hard to describe but this is often an issue with bullet connectors and it makes a big difference in terms of the connectors durability and the quality of the connection over time)
  • You do not need heat shrink tubing
  • They are sturdy connectors and feels like they will last forever
  • The joint between two connectors is robust and will not disconnect accidentally (but unlike some connectors they are still easy to pull apart when needed)
  • Connectors can be stacked via a clever system
  •  All connectors are identical (i.e. there is no male or female type of connector) and they are therefore perfect for connecting batteries in series
  • In my experience the nominal currents can easily be exceeded. Many use the 45A connector in applications up to 90A and 75A connector is seen used up to 150A and a few even 200A (do be careful here though!)

For some reason I have not seen many that use the Anderson PowerPoles and I therefore thought it would make sense to write a few lines about them now that I have had such a great experience with them.

Please check out my videos here of how they work:

Have fun!

Facebooktwitterredditpinterestlinkedinmail

Building a Losi 5ive-T Brushless (part 3) – Fitting the parts and testing the truck

Losi 5ive-T Brushless Conversion

When building this Losi 5ive-T brushless truck I had a set of criteria that I wanted to respect:

  1. The car should have around 15-20 minutes of run time
  2. I would prefer to have motor break and reverse option enabled
  3. The steering servo should be capable = powerful and fast
  4. All parts should be a-grade and have been put through their paces by other drivers (and with positive reviews)

I therefore decided on ordering the following goodies:

  • ZIPPY Flightmax 8000mAh 4S1P 30C batteries from HobbyKing
  • Hitec HS-1000SGT High Voltage Giant Torque Servo Conversion Kit for Losi 5ive. This beast deliver over 1500oz of torque!!
  • Killer RC Super Power Switch
  • RC Madness BL5 Version 2 Conversion

Here a few pics of the parts and mounting them:

RC Madness Version 2 Brushless Conversion Kit for the Losi 5IVE-T
RC Madness Version 2 Brushless Conversion Kit for the Losi 5IVE-TRC Madness Version 2 Brushless Conversion Kit for the Losi 5IVE-T
RC Madness Version 2 Brushless Conversion Kit for the Losi 5IVE-T
RC Madness Version 2 Brushless Conversion Kit for the Losi 5IVE-T - Battery tray
RC Madness Version 2 Brushless Conversion Kit for the Losi 5IVE-T – Battery tray
RC Madness Version 2 Brushless Conversion Kit for the Losi 5IVE-T - Battery tray
RC Madness Version 2 Brushless Conversion Kit for the Losi 5IVE-T – Battery tray
RC Madness Version 2 Brushless Conversion Kit for the Losi 5IVE-T - Motor mount
RC Madness Version 2 Brushless Conversion Kit for the Losi 5IVE-T – Motor mount
RC Madness Version 2 Brushless Conversion Kit for the Losi 5IVE-T - Motor mount
RC Madness Version 2 Brushless Conversion Kit for the Losi 5IVE-T – Motor mount
Hitec HS-1000SGT High Voltage Giant Torque Servo Conversion Kit for Losi 5ive-T
Hitec HS-1000SGT High Voltage Giant Torque Servo
Hitec HS-1000SGT High Voltage Giant Torque Servo Conversion Kit for Losi 5ive-T
Killer RC 3600mAh 14.8v RX Lipo Battery
Killer RC Super Power Switch Installed In The Losi 5ive-T
Killer RC Servo-Max voltage regulator and 14.8v 4S 3600mAh LiPo battery installed in the Losi 5ive-T

The results

Before starting the project I had read tons of forum posts and seen many YouTube videos. I have followed most of the advice and chosen components that were all of high quality. Most however recommended the use of the Lehner/MGM combo and mechanical brakes but as you can see in Part 2 of this series I chose differently.

So how did it all go?

Well so far I can safely say that I am all satisfied with my truck and the decisions made. Batteries, ESC and motor have all been running smoothly with good temps and great runtimes. I have not timed it but I would think that I get at least 18-20 minutes run time on one set of 8S batteries.

The motor brakes (and reverse) have worked great. It may very well be that if you are a super competitive and very skilful driver there may be something to gain by having the (some say) better control using the mechanical brakes but I have had no issues whatsoever and love the setup as it is now. I have the control that I need when braking and love the fact that I can reverse whenever needed.

So for now I have had a ton of fun – building this vehicle has been a blast and driving it even more so.

If you have the funds and want to experience a brushless version of the largest 4WD RC truck on the market then you can’t go wrong with the Losi 5ive-T and I can definitely recommend the setup I have gone for here.

Have fun and drive safely 😉

Losi 5ive-T Brushless Conversion
Final weight of the Losi 5-ive T Brushless with batteries
Facebooktwitterredditpinterestlinkedinmail

Team Durango DEX8 – Fastet kit build ever!

Team Durango DEX8 Buggy

I have built 1/8 buggy kits from Hobao/Ofna and Xray before I picked up this Team Durango DEX8 kit and hence thought this would be a somewhat similar build experience. I could not have been more wrong.

Just the unboxing experience is something different. The box and how it is packaged is the best I’ve tried so far with RC. They have no doubt tried to create an “Apple unboxing” experience and have in my view succeeded.

As for the build most of the parts are assembled in larger chunks. Diffs and shocks are all assembled (you will have to add diff and shock oil to match your preference) and front and rear drivetrain are almost also just a bolt-on. Very nicely thought through.

As for the build quality everything seems to be top notch but I have yet to test it out on the track. So far I have only managed to drive it up and down the street – everything was buttery smooth and only the steering needed to be slightly trimmed.

If I should have to point out something negative it would be the manual that came with the car. There were a few steps where stuff was incorrect – probably they wanted to get the product to market as soon as it left the factory. All it took was to download the latest version and here the issues were corrected.

Now – all I need to do is hit the tracks – Something I look forward to!

IMG_6831

IMG_6833

IMG_6834

IMG_6835

IMG_6836

IMG_6837

IMG_6838

IMG_6839

IMG_6840

Facebooktwitterredditpinterestlinkedinmail

My Cellpro PowerLab 8 v2 charger – 2688W powerhouse in a Peli 1560 case

Cellpro Powerlab 8 v2 charger

It’s been eight years now since I bought my first RC car. Since then I have had a ton of cars and planes and I have constantly bought new and better equipment. This however has not been the case with my Cellpro PowerLab 8 v2 charger. Why is that you may ask…?

Well the answer is simple – it is built like a tank, it has been working flawlessly and more importantly, there is yet to be a charger released that outperforms it in power and reliability.

My setup consists of the following:

  • 2 x Cellpro PowerLab 8 v2 chargers – 1344W
  • 2 x Mean Well SE-1500-24 power supplies
  • 1 x Peli Case 1560

So… If you are looking for a killer charger that will refill your batteries faster than any other charger on the market and you want the best-of-the-best then this is the charger for you. I HIGHLY recommend it!

IMG_6847

IMG_6841

IMG_6848

IMG_6849 IMG_6844

IMG_6843

IMG_6846

IMG_6845

IMG_6850

IMG_6851

Facebooktwitterredditpinterestlinkedinmail

Traxxas E-Revo Brushless – The best all-round RC car money can buy!

Traxxas E-Revo Brushless 4WD Monster Truck

Through the years I have tried racing on tarmac, sand and gravel with everything from buggies to trucks and monster trucks. I have tried 2WD and 4WD vehicles powered by gasoline, brushed and brushless motors. All has been great fun and I have always enjoyed the great selection and thereby the versatility of this hobby.

A few years back I bought a Traxxas E-revo brushless car. My main purpose was to have something that was the “ultimate bashing vehicle” to be used in gravel pits. I had a long list of requirements:

  • It should be durable and capable of taking a solid beating when landing after big jumps
  • Spare parts should be readily available and not overly expensive
  • It should be 4WD in order for it to climb the big gravel piles and still make it to the top
  • It should come with a decent transmitter and not need a heap of up-grades before being ready to race
  • It should be fairly powerful but still have enough runtime to do bashing for at around 20 minutes on one set of batteries

Before the purchase I did a lot of research and found that all the boxes seemed to be ticked.

I had the car for around 12 months and drove it extensively over that timespan. Never have I put a car through so much and still had a car that just kept on going. Most of the time it was used in the gravel pit but I also tried it out on a 1/8 scale track and on tarmac only changing the tires to suit the surface. It stood out most when doing bashing on gravel but was aways a solid performer on other surfaces

But most importantly… I can’t recall I having had so much fun with as with the Traxxas E-Revo Brushless Edition. It is just THAT good and therefore I went along and bought one again after being away from RC cars for 2-3 years. A thing worth mentioning is that the car has had a few good upgrades in that timespan – the ESC has been made waterproof which was as a bit of a painpoint in the previous version and now it also features pretty solid telemetry if the transmitter is coupled with a smartphone using the Traxxas Link app via bluetooth. I have briefly tried out the telemetry and it seems to work well giving data such as speed, battery voltage, temperature and RPM.

As you can see from the pictures below I have bought the Traxxas Rustler VXL for my son who is 7 years old and I am also building a Losi 5ive-T brushless car that I plan to finish over the coming 4-6 weeks (waiting for parts to arrive from multiple hobby shops).

So all in all – this vehicle comes with the best of recommendations from my side and I look forward to having as much fun again with it as I did in the past!

Traxxas E-Revo Brushless 4WD Monster Truck
Traxxas E-Revo Brushless Waterproof 4WD Monster Truck
Traxxas E-Revo Brushless shock system
Traxxas E-revo brushless and waterproof underneath
Traxxas E-revo brushless and waterproof
Traxxas TQi radio
Traxxas TQi radio
Traxxas TQi radio close-up
The Traxxas E-Revo and Traxxas Rustler VXL compared
The Traxxas E-Revo and Losi 5ive-T compared
Facebooktwitterredditpinterestlinkedinmail

Building a Losi 5ive-T Brushless (part 2) – Choosing the motor and ESC

Castle Creations 2028 Extreme 800kv brushless motor

Back in 2010 long before HPI released their HPI Baja 5B Flux 1/5 scale brushless car  I made a Baja 5B brushless conversion using a big Schulze ESC and tested two different motors – one being a Neu 2230 and the other a Lehner 3060. This was a very capable setup and even though I really enjoyed the build and had fun driving it a few times I must admit that the setup was just too powerful for the car to put down the immense power to the ground.

Now with the Losi 5ive-T and 4WD it should be easier to get proper traction instead of the 2WD on the HPI Baja 5B that I ended up crashing. So in choosing the motor and ESC I made five decisions:

  1. Start out with something that can be upgraded to more cells if I need more power but don’t start out like last time and “overdo” it
  2. Build a car that works well on the track and for bashing – I will not be doing speedruns or something similar
  3. Even though it will put pressure on the ESC I have decided to use the motor and ESC for breaking
  4. Get something where there is a reasonable balance between price and quality/performance
  5. Get something that has been on the market for a while and has been tested thoroughly (no cheap stuff from HobbyKing or similar)

The motor for the Losi 5ive-T

Having looked at the options today I got it narrowed down to three options for the Motor. The Lehner 3080, the Neu 2230 or the Castle Creations 2028 (which is basically a Neu motor just mass produced). My priority list would be the Lehner 3080 as the preferred choice but I ended up with the Castle Creations 2028 instead for two reasons. It has had great reviews on many forums, it is by far the best bang for the buck and I could run the car on a range from 8-12 cells which is what I would prefer to start out with (more on that later).

It is also worth mentioning that Castle Creations recently made some performance-enhancing updates to this massive motor:

  • Revised stator and magnet shapes provide lower cogging torque for improved starting performance
  • The new 800Kv rating will make the setup faster
  • Rated at a higher RPM (45,000) due to improved manufacturing processes
  • Capable of operating on 12S

Here some photos of the unit as it comes right out of the box including a shot with the motor on a scale and a size comparison to a Castle Creations motor in a 1/10 Traxxas E-Revo:

Castle Creations 2028 Extreme 800kv brushless motor

 The ESC for the Losi 5ive-T

Finding the ESC turned out to be a choice between two manufacturers and both options had its pros and cons. One option was going with the highly praised MGM controller lineup. From what I can gather going over tons of YouTube videos and forums the TMM 25063-3 for Cars X2-SERIES PRO should be a solid performer and I have yet to find anyone stating that this has caused them issues or that has complained about performance. This ESC is capable of handling 15S and 250amps continous. The only downside is the price tag at around 610EUR  with a few necessary optionals (fan, on/off switch, water protection, wiring).

The second option was the Castle Creations Mamba XL2 ESC. This speed controller is an excellent partner for the 2028 motor and is fairly priced at 171USD. This has also been on the market for a few years but with that said there has been issues with the unit and many have experienced that it went up in smoke. Furthermore there is an issue with the warranty and the fact that the Losi 5ive-T will probably weigh around 35lbs. Castle Creations write the following on their website:

“The Mamba XL 2 and 2028 motor are recommended and warrantied in vehicles weighing less than 25lbs for 4WD and 30lbs for 2WD. Any use outside of these recommendations may lead to an ESC and/or motor failure that is not covered by the manufacturer’s warranty.”

Also the Mamba XL2 ESC is only capable of taking up to 8S batteries but going back to my wish to start out and then be able to upgrade I decided that with the affordable price tag, the fact that they should have fixed most issues by now and that I have seen a few videos on YouTube where this setup is tested made me confident that this was the right place to start. This would also allow me to upgrade to the MGM controller if and when this should ever become relevant.

Castle Creations Mamba XL2 ESC

Videos of the Losi 5ive-T with the Mamba XL2 ESC and 2028 motor

The following is a two videos show a) a car with the same setup running and b) a video review of the Losi 5ive-T and the Castle Creations motor/ESC combo:

Continue to part 3 of the Losi 5ive-T build series http://deguno.com/rc-cars/building-a-losi-5ive-t-brushless-part-3-fitting-the-parts-and-testing-the-truck

Facebooktwitterredditpinterestlinkedinmail

Building a Losi 5ive-T Brushless (part 1) – Stripping down the car

After having tried lots of different brands on the 1/5 scale scene – including HPI, FG and MCD – it was time to try something new. I had been away from large scale off-road cars for a few years and initially wanted to build a HPI Baja 5B brushless car but then found that there was a new sheriff in town – The Losi 5ive-T!

Many things with the Losi 5ive-T caught my eye. It was bigger in every way when compared to the competition, it was four-wheel drive, reviews on different forums were good, it seemed easy to work on and to do a brushless conversion and last but not least – it looked bad-ass.

So the first step was to get a hold of a Losi 5ive-T roller. Contrary to the Losi 5ive-T ready-to-bind model the 5ive-T roller comes without RC-components like servos, receiver, telemetry sensors, receiver battery, charger, engine, clutch and muffler – all stuff that I did not need now that I was doing a brushless conversion. I found one in Germany at an online hobby shop and paid €949 including a painted body.

Here is the car and the parts you get with the roller:
Losi 5ive-T Roller

Losi 5ive-T Roller accessories

Losi 5ive-T Roller rear

Losi 5ive-T Roller front

Before going any further and getting started with stripping down the car I wanted to check  the weight of the car. Not that I am fanatic about the final weight but with that said I still wanted to keep an eye on it making sure that no fancy upgrades were to be added if the had too much of an impact on weight. Here the weight before stripping down the car (13.6kg = 30 pounds):

Losi 5ive-T roller - Weight out of the box

So now it was time to start getting rid of things that were not needed in the brushless conversion. First thing to go was the fuel tank:

Losi 5ive-T roller - Fuel tank removed

I had also decided to use the ESC and Brushless motor for breaking so next up was removing the standard breaks:

Losi 5ive-T roller - Standard breaks removed

Losi 5ive-T roller - Standard breaks removed

With these parts removed the Losi 5ive-T had already shed 500 grams (1.1 pound) and now weighed in at 13.1kg (28.9 pounds):

Losi 5ive-T roller - Weight after removing the tank and standard breaking system

All in all this took 15 minutes and the car was now ready to start installing the first parts. Stay tuned for part two where we mount the motor and ESC and please do comment below if you have questions or things you would like to know more about.

Part 2: Building a Losi 5ive-T Brushless (part 2) – Choosing the motor and ESC

Facebooktwitterredditpinterestlinkedinmail

Mafell MT 55 cc review – King of the plunge-cut saws

Mafell Plunge-Cut Saw MT 55 cc MaxiMAX

We have lived in apartments until we bought our house about two years ago and I finally got what I had dreamed of for years – a workshop! I decided to get some proper woodworking tools but with the limited space available a large table saw or cabinet saw was out of the question. A good quality plunge-cut saw was therefore the natural choice to cut those large sheets of plywood.

Requirements
I have only ever owned cheap circular saws in the past but after spending an evening or two researching the market I made up my mind on list of requirements. I wanted:

  • Great dust collection
  • Top of the line accuracy
  • Sturdy construction that would serve me for years to come
  • Good quality guide rails that could be extended for long cuts

I quickly got my mind set on the Mafell MT 55 cc after reading several reviews – it seemed to tick all the boxes above and after inspecting it at my local hardware shop I had made up my mind. With this said I have no way of justifying the price tag when taking into consideration how often I actually use it and that it’s only for hobby use but nothing beats the feeling of using quality tools so I went for it.

Competitors
There is no doubt that Festool used to be king of the hill when it comes to plunge-cut saws and the Festool TS 55 R was one of the main alternatives that I considered. Their saws and the tons of accessories they offer are very appealing but everywhere I turned the Mafell MT 55 cc was just getting better reviews. Predominantly because of the build quality, better guide rails, the quick change of saw blades and the scoring function.

An interesting thread on the Mafell vs Festool can be found on the Festool Owners Group where even the Festool fanboys mostly favor the Mafell.

http://festoolownersgroup.com/festool-tools-accessories/festool-and-mafell/

My experience
I have had the saw for around 12 months now and I am in no way disappointed. Everything that I have used it for has been absolutely perfect. Making adjustments is so easy, the motor is super strong and have never broken a sweat. Precision is perfect and I am very impressed with the dust collection.

The blade that it comes with has been perfectly fine for everything that I use it for. I have only ever tested the scoring function for the fun of it – in normal use I have never needed it because the saw does such an outstanding job without it.

I bought the saw with two 1.6 meter guide rails. This is a highly recommended setup. For cross-cuts of 4×8 sheets (1220×2440 mm) I use one guide rail and when doing the long cuts I combine them to get a 3.2 meter rail.

Pros and cons
The list of things this saw does well is pretty extensive:

  • Great build quality
  • Great dust collection
  • Innovative features such as the fast blade change and scoring function
  • Super strong motor
  • Fast adjustment and spot on cuts every time
  • Great guide rails (and if you already have Festool guide rails it will work just fine on them as well)

The only drawback I can really point to besides the somewhat steep price tag that it comes with is that if you have already bought into the Festool line-up with tons of accessories it may not be that the advantages of the Mafell saw over the Festool equivalent outweighs the benefits of having a Festool saw that works with all the other Festool accessories. But if you want the best stand-alone plunge-cut saw on the market I would strongly argue that Mafell MT 55 cc is that saw.

Conclusion
There is no doubt in my mind that the Mafell MT 55 cc  is the king of the plunge-cut saws. Everything I have put it through it has handled flawlessly and even though I had pretty high expectations before buying it it has not disappointed one single time.

So I would not hesitate for a second to recommend it. It does come with a high price tag but I would say that here you get what you pay for – it is worth every penny and it is just that good!

Facebooktwitterredditpinterestlinkedinmail

Egardia alarm system – Review after 3 months of use

Review of the Egardia home alarm system

As is the case with most of us it takes an incident of some sort for people to go and invest in a home alarm system. In our case  we made the decision when our neighbours got burgled and had their house torn apart.

Our requirements
As always I spend quite a while researching the options in the market when buying something where I have limited knowledge. With alarm systems I quickly found out that we were not willing to pay a hefty premium to a home security company where the cost of the alarm system itself and monthly monitoring, for protection against crimes could easily exceed €40 / $55. The main reason was not the cost per month but more the poor response time in case of an incident where they could take up to 20 minutes to arrive and at that time the burglar would be long gone.

So I started looking into what my requirements were and came up with a shortlist looking somewhat like this:

  • I wanted a loud outdoor siren with tamper protection
  • I wanted it to call and text me, my wife and our neighbours in case of an alarm
  • I wanted to make sure that burglars could not just switch off the system to block it from sending messages
  • I wanted the system to look ok in the home environment (e.g. the key pad, the motion detectors, the door/window sensors, the siren)
  • I also would like it to include the ability to control the light and if possible make it possible to turn on or off the system remotely

Up front cost was not really an issue so we first looked at a budget from a 3 year cost of ownership perspective where we had an idea of how much we were willing to pay.

Finding the right system
As it turns out there are about a gazillion options out there and to be honest most of them look a bit dodgy like cheap asian products that I would have a hard time putting my confidence in. Manufacturers and vendors of course praise them endlessly but judging from the looks alone the perception of quality made me disregard a lot of them. I also spent some time digging out recent reviews where multiple systems were benchmarked against each other. Not a lot popped up but one did catch my attention:

http://etm-testmagazin.de/tests/funk-alarmanlagen-im-test-1244

The test is in German and cost €2 and was well worth it since you get a detailed and (so it seems) objective information on the pros and cons of the different options. I ended up zooming in on the test winner which was the Egardia alarm system. The test highlight the pros of this system as being acquisition cost, performance and handling whereas the cons is the monthly subscription fee of €8.95 (the system is practically worthless without the subscription) and the required internet access (LAN).

The unboxing and first impressions
We ended up ordering the following:

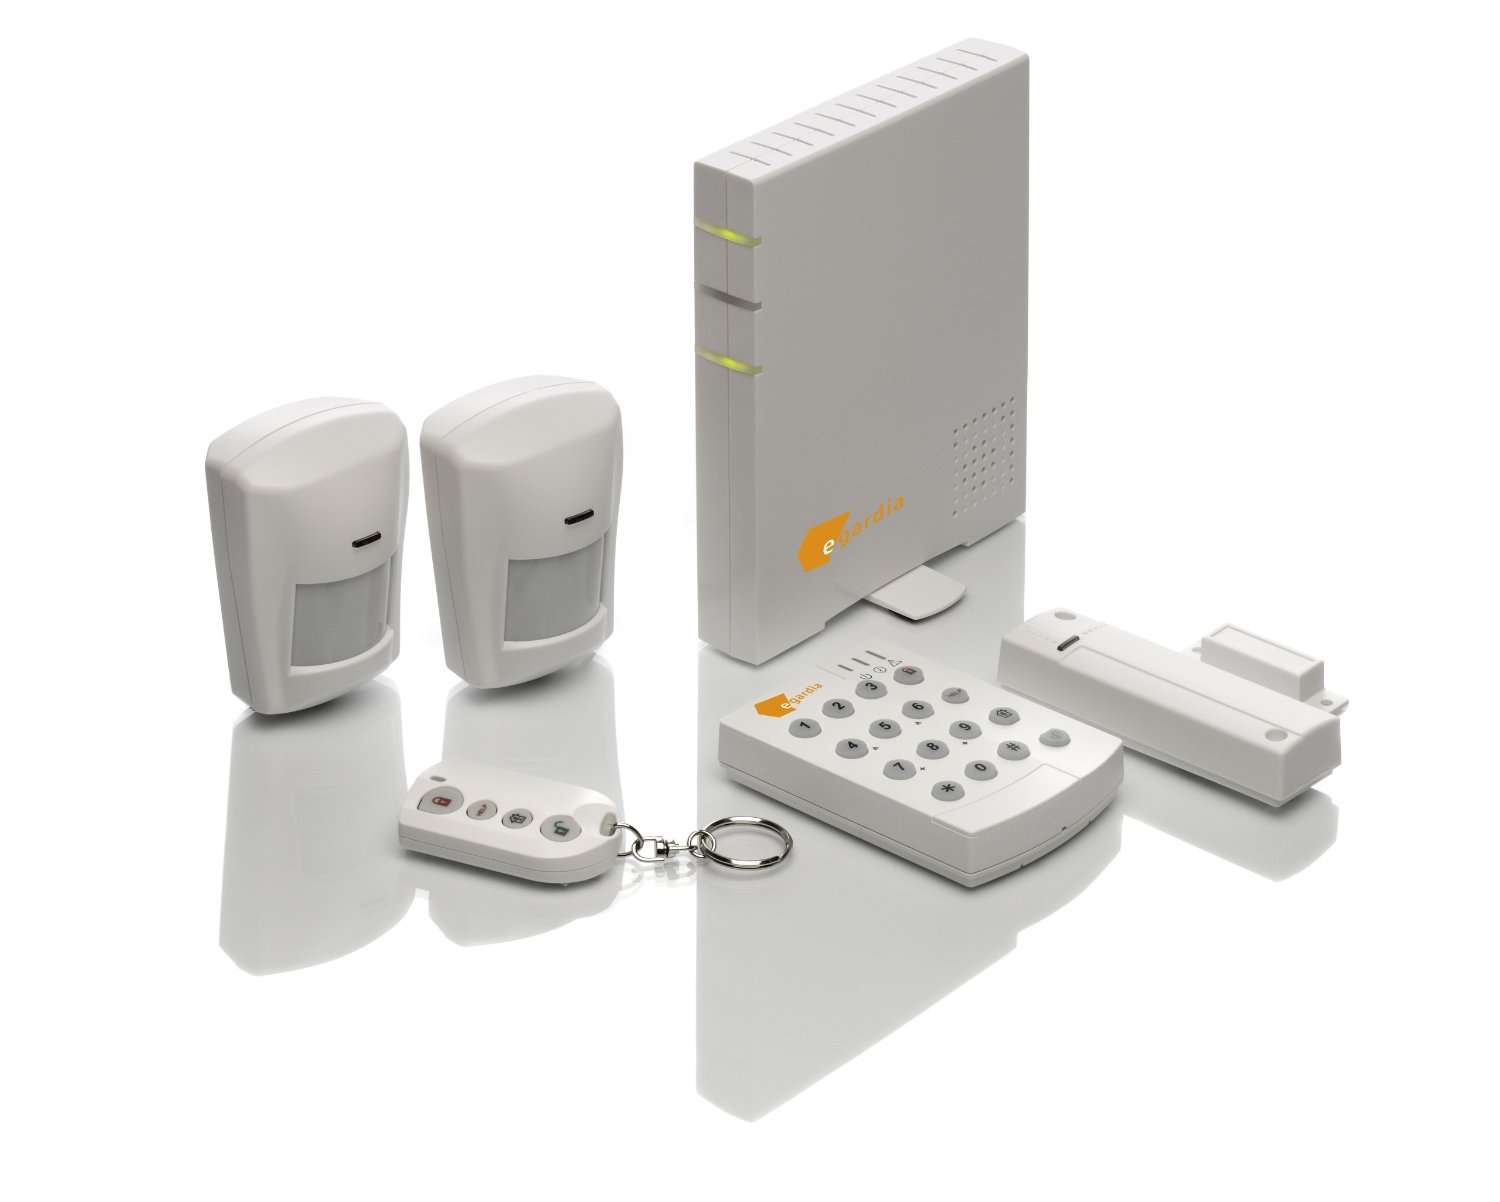
  • The basic package that comes with the main unit, 1 door/window sensor, 2 motion sensors, one keypad and one key fob
  • The outdoor alarm (Bell box)
  • Extra motion sensors
  • Extra door / window sensors
  • The smart plug that enable you to control light remotely

When unboxing it all you got a sense that they had really thought about all the little details. Everything was clearly marked, the products seemed solid and the packaging was top notch from start to finish.

Setting up the system
All components of the basic package was pre-configured making it a plug-and-play experience to setup but there were definitely a few bumps on the road that I would like to point out.

First step was to setup an account with Egardia where I also had to pay up-front for the “Security service” fee which is €8.95/month. I thought that I might as well do this on my iPhone but alas even with a lousy user experience with a flow clearly not optimized for mobile I ended up giving up when I came to the payment which did not work at all. I then switched on my laptop and went through it all again. One thing got me very confused. I wanted to save a little by pre-paying the service for 3 years but in the flow it somehow seemed that even though we were in December I was forced to pay for the full year of 2013. It was only later when I checked in the system that it was clear that it was 36 months onwards. Again a small thing that causes irritation and ruins the first experience a bit.

So with the Egardia account in place and the main unit plugged in (ethernet cable and power cord) and registered setting up the basic package was as close to plug-n-play as it gets. Everything was pre-configured and since I used the double sticky tape to mount everything instead of screws it took literally minutes to setup.

The issue came later with adding all the other units. This turned out to be somewhat more cumbersome and it took me a while to figure out how it all worked. The provided documentation was definitely not clear and to the point on how to easily add new components. I kinda wish they had learned from the likes of Sonos where adding new units is just a 10 second task.

Features and desktop / app user experience
From a functional perspective the Egardia system is brilliant. When an alarm goes off the main unit and outdoor siren is triggered. The main unit siren is not loud enough for anyone to hear outside the building so it predominantly scares the burglars away or warn whoever is in the building. The outdoor siren however is quite loud and works perfectly.

After a few seconds the system then system sends text messages and/or calls whoever is on a list of contacts. This is where the magic happens. Our neighbours can be here in seconds rather than up to 20 minutes (which is what the home security companies has to offer)

To control the system simply login to www.my.egardia.com and there you will have access to all features including:

  • Settings for all accessories
  • Settings for all contacts
  • Alarm history
  • Cameras (I do not have any so this is not part of my review)
  • Energy control (to control smart plugs)

All in all the desktop web experience is alright. It seems a bit to be outdated from a user experience and design perspective and could well be made by an engineer or the like rather than a skilled UI/UX designer. Since this is the main control center they could really move forward the user experience and brand perception if they upped their game and made an effort to improve this area.

This brings me to one of the biggest drawbacks of the Egardia alarm system. The iPhone app seems like a joke or something that is still in beta (and I am not talking Google beta quality here…). It works well for switching on or off the alarm remotely but other than that it is an miserable experience. The features are non-existing with only an event log, camera access (which I do not use), ability to turn on and off the light via the smart plugs (but not the ability to change the schedule or something similar like on the web administration). With the amount of smartphones being sold this should be their key focus and where they beat the competition. Take a look at what Nest has done with their self-learning and programmable thermostats they have clearly understood how this is done and with Google recently buying them for $3.2 billion they seem to have made pretty big impact in little time. It is my hope that Egardia will soon put some effort into making the app full featured to bring it up to par with the web administration and that they will also invest in better user experience design.

How it works on an everyday basis
On a daily basis where we just turn on the alarm when we leave in the morning and back on again in the afternoon things work perfectly. All is setup the way we want it on the web administration so it takes very little tweaking on a day to day basis. So in general we all seem happy with it. Two things that I would like to point out though

  • The motion detection sensors could be more sensitive. I have sometimes walked right past them with the alarm turned on without the alarm going off. This happened a few times in the beginning when we had not yet gotten used to having the alarm
  • When turning on and off the alarm the external siren beeps until the alarm is activated. I wanted to turn this off but somehow this does not work even though the option is there. I did try and get an answer through the Egardia customer support but they never got back to me with a reply.
  • On some occasions I have also experienced a “Gateway can not connect to Egardia” message in the web administration. This is not a frequent thing but still worth mentioning. I hope this would not in any way impact negatively in case of a real alarm…

Pros and cons
On the positive side is the quality feeling of the product, the way they have packaged it and how easy it is to setup when you only buy the basic system. I also love the tamper protection features and the way you can swiftly create multiple contacts that can respond in case of an alarm. I love the fact that the subscription includes free and unlimited mails, calls and text messages which is a great alternative to the competitors who require a SIM card (which is also vulnerable if the system power is cut). And on a daily basis the use of the Egardia alarm system is simple and straightforward once it is up and running.

When it comes to the drawbacks I would highlight the miserable app, the sensitivity of the motion detectors, the setup complexity when adding more accessories to the system and perhaps also the business model that over time makes it fairly expensive. Do keep in mind that the system is practically useless without the subscription with only the siren going off in case of an alarm (no text messages/mails, no alerts when battery is low, no system messages, no ability to change accessory settings)

Value for money
On the Egardia.com website the have a section called “Why so inexpensive?”. Of course with a clever marketing manager you should expect something like this but I would like to elaborate a bit more on it.

Isolating the upfront investment price in the basic system the system is pretty cheap and if compared to home security companies it is also cheap. But if compared with the bulk of alarm systems on the market I would actually rank it on the higher end in terms of price. The basic alarm system is around €300 + shipping and we ended up paying more than double that for a few extra accessories (which are seemingly more expensive when bought separately). On top comes the €8.95 price tag per month for the subscription so our overall cost of ownership for a 3 year period is close to €1000 / $1375 which is not exactly cheap.

Wrap-up – Would I recommend it?
Overall knowing what I know now I would still have bought the Egardia system. The core product is good and the key areas where they fail is something that can be dealt with via software updates. I have not really seen any updates in the last three months but I keep my fingers crossed and hope that they will get in gear and create a proper user experience and add the necessary features their mobile apps.

Also looking at how my wife and kids use the system it seems to work alright. They don’t use the app and web interface like I do and have not been part of setting it all up but it is still relevant to take their views into consideration since the whole family has to live with it.

So to make it really short. Egardia has a good product offering that I would consider to be in the higher price segment of alarms. Egardia has the potential to go from good to great if they just made a slight effort and looked at some of the leading tech companies today (I have used exampled from Nest and Sonos but there are many more).

Facebooktwitterredditpinterestlinkedinmail

Bosch PBD 40 710W bench drill review – Innovative features at an affordable price

Bosch PBD 40 710W bench drill

I always wanted a proper bench drill in my workshop but to be honest I don’t really need it that often but when I do it is one of those tools that just make life so much easier. When exploring the market for something of a decent quality I always ended up having to pay too much and still not be satisfied with the engineering. I was therefore checking out the second hand market on the classifieds sites when I stumbled upon the Bosch PBD 40 at a local hardware shop…

Promo video

Unique features
The Bosch PBD 40 710W bench drill comes with a ton of  unique features as shown in the promo video above. The clamp and fence system is super easy to use, the LCD with RPM and depth of cut is miles better than anything I’ve seen before.

The cross-hair laser also works well. I use it all the time but if something has to be super accurate I always find myself predrilling to make sure that all is perfect.

My experience
I have now had the Bosch PBD 40 for around two years and as an amateur woodworker and DIY hobbyist  I have to say that it has worked brilliantly for all I have used it for.

The motor seems very capable and used with a 35mm Festool forstner style drill bit it it was like a knife through butter with no hint of labouring under the load. The adjustable speed control is also one of the main benefits of this machine – no mucking about with belts – just turn the dial and you’re done.

The combination of the clamp and fence combined with the LED light and the cross-hair laser makes everything very swift and efficient. The LCD display with the depth of cut shown also supports this experience and the Bosch is just overall well thought through.

So far so good… Now what about design faults? I have read reviews where some complain about accuracy and as you can read below from the list of cons I could list a few minor things that could have been made my experience of the Bosch PBD 40 bench drill better. But considering the cost and all what it does well it is negligible.

Pros and cons
Pros include:

  • Clamping system works great and also works well with pipes an round objects
  • Clear, backlit LCD display showing RPM and depth of cut, with measurement shown to the nearest tenth of a millimeter
  • Strong motor that will drill steel or wood with large forstner bits
  • LED light and cross-hair lasers
  • 21st century technology at an attractive price

Cons include:

  • Drill waste is cumbersome to remove
  • Larger drill benches have fences and stops making them better for repeat work
  • I still prefer the classic drill bench pull handle over the dial wheel that the Bosch PBD 40 is equipped with

Conclusion
For the hobbyist with a small workshop I would consider the Bosch PBD 40 drill bench the perfect choice. Sure there are classic bench drills that can be bought second hand that would be great alternatives but the Bosch still has some tricks up its sleeve with the bulk of innovative features it packs.

So there it is I’m giving this a solid 4 stars because I think it’s the near perfect piece of kit for the person it is clearly designed for – the DIY woodworker and I would have no hesitation in recommending the Bosch PBD 40 710W bench drill.

Facebooktwitterredditpinterestlinkedinmail